
This article shows how to build and add parts to DGIS. For more information on parts, see: Searching and Managing Your Parts
To begin working with parts, click on the Parts tab at the top of the screen.

You will have options to add a new part, view an existing part, edit an existing part, manage exemptions, and manage packaging.
New Parts
To Add a New Part
To add a new part, select New Part from the Part drop-down menu.

Once you click on New Part, you will see the following screen:

Begin by entering the number you want associated with the part, in the Part Number field. The Part Number is what you will use to search for and select a part when adding a material to a shipment. Any description you want associated with the part should be entered in the Part Description field.
Variant parts are parts that are similar to other parts, but have important differences, such as quantities or UNID’s. If your part is a variant of another part, select the Is Variant option. You can also add the Manufacturer’s part number and name, as well as the Lot Number and Part Expiration Date.
Select the regulations the part needs to be enabled for. If the regulation mode is not selected here, then the part cannot be added to a shipment that uses that regulation mode.
Once finished, you can click on Add to use the part. Once you have added a part, the part will be in Edit Status.
Building a Part
In order to build a part, you will need to use several menus that appear after adding the part.

Part: This section contains the same information that was initially entered when creating the new part. You can click Edit to revise this information.
Child Part: This section allows you to associate parts. Child parts are associated with a primary part, but both have individual part numbers. This allows users to bring up a single part, but see all associated parts as well. Adding a child part requires you to enter the part number as well as a description.
Locations: This section allows you to add a part to a particular location within your company or to all locations. It is by default added to the Location that the user creating the part is assigned to.
Materials: This section allows you to add your hazardous material to your part. You will see several options when adding a material:

Net Weight and Explosive Net Weight allow you to enter in the amounts of the material that are associated with the part. You can enter the amounts as well as change the unit of measure using the drop-down fields. These fields can be left blank if the part is shipped with varying quantities.
You can add the actual material by entering the UNID in the Find Material field under the appropriate regulation. Once entered, click on find.
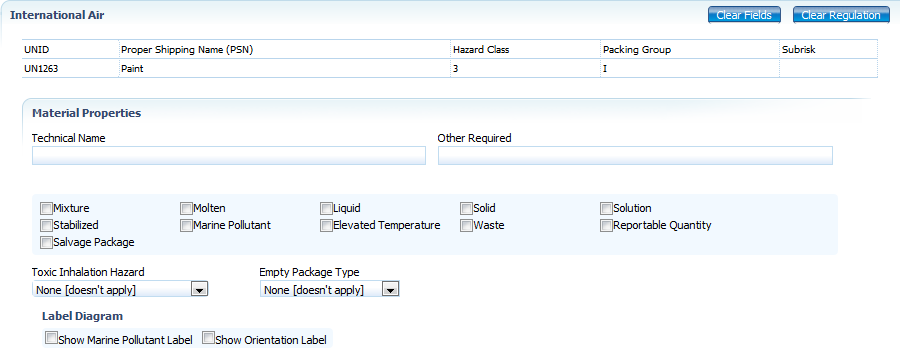
Clicking Find will give you a list of possible materials to choose from. Click Select, and it will bring you to the screen shown above.
You can enter in a Technical Name as well as any additional required information that needs to appear on the shipping paper.
You can also use the Copy Data feature to populate other regulations for that same material. Once you have the material entered for one regulation, simply select that regulation as the Source, select which regulations you would like to copy it to, and then click Copy:

Doing so will bring up the regulations for that material, or its closest match. If it brings up close matches in regulations, you will be given a choice as to what you would like to use for that material. Here it is set to copy the selected material and information entered from International Air to 49 CFR.
Once you have entered all material information for your part, click Save in the top right hand corner and you will return to the Edit Part screen.
- Exemptions: Once you have added a material to a part, you will see a new section under the material, Exemptions. Once you’ve added an Exemption (covered in the Managing Exemptions section), you can add it to a part by clicking on Add Exemption, which brings up this screen:
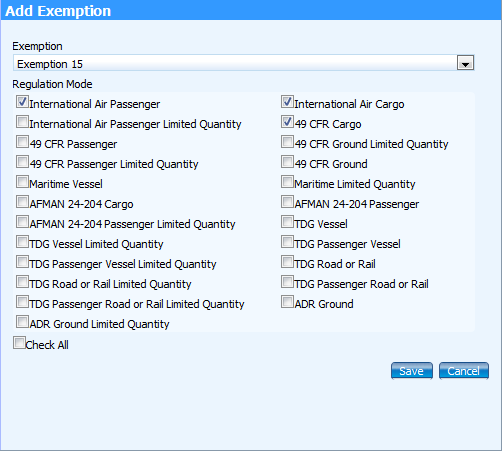
You can select which Exemption to add in the drop-down list and which Regulation Modes the exemption is for. Click Save to add the exemption.
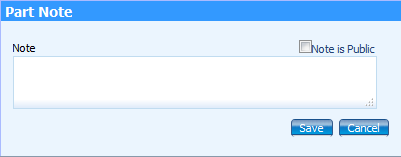
- Notes: Notes are simply additional information you would like to appear when bringing up a part. By clicking Add Note, you will bring up a text box that allows you to enter whatever additional information you would like. Once you have entered your information, click Save to return to the Edit part screen. The note appears in a shipment when you have selected the part as the material for the shipment or you can see the note when viewing the part.
- Packaging: You can select what kind of packaging is associated with your part, by clicking on Add Packaging. Doing so will bring up the following screen:

You can select from the types of packaging that you have entered under the Packaging drop-down menu (covered in the Managing Packaging section) and select which regulations this packaging should be enabled for.
- Documents: You can associate documents with a part by clicking on Add Document. This will bring you to the following screen:

You can give your document a title as well as a description. You can also select what the type of document is, from the Document Type drop-down menu. Once you have entered this information, you can upload the document by selecting Browse and navigating to the file’s location. You can also select the file from an incoming folder, if you have configured a folder for upload. You can also select which Regulation Mode the packaging is to be enabled for. Once you have entered all of the information, select Save and the document will be associated with your part.
- Shipping Papers: You can have examples of shipping papers that include this part for reference. Simply click on Update Shipping Papers to add them. You do not need to have shipping papers listed here, it is meant to provide examples of shipments that use this part.
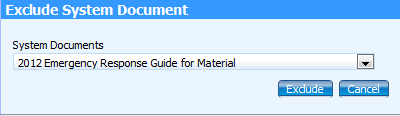
Select which document you would like to exclude and click Exclude. If there are multiple documents you would like to exclude, take these same steps for each document. Once you have made these selections, you will see each document listed on the Edit Part screen.
Once you have completed each section for your part, click Editing Complete to change the status of the part to To be Approved. The part must go through the approval process to get Approved status, at which point the part will be available for use.
Part Statuses
There are four statuses that a part can be in: Edit, To be Approved, Approved and Disabled.
Editing Status: When a part is in this status, the part is not available for use. Editing status allows the Administrator to change information associated with the part.

To be Approved Status: When a part is in this status, the part is not available for use, and is not available for changes to the part. The part needs to be reviewed in this status, to ensure all information associated with the part is correct. For the part to become available, an administrator with the appropriate rights must approve the part.

Approved Status: When a part is in this status, it has been reviewed by an administrator and is now available for use.

Disabled Status: When a part is in this status, it has been removed from use. The part still exists and can still be edited by an administrator with the correct rights. To take a part out disabled status, click on “Enable Part.”

Once your part is added, see: Searching and Managing Parts
0 Comments