
This article provides the steps for adding material and packaging to a shipment within DGIS. For the full steps to complete a shipment, see the following:
- Starting a Shipment
- Entering Shipment Information
- Adding Your Material and Packaging (current article)
- Finishing Your Shipment
Once the shipment information is entered, you can build your package. To add your hazardous material click on Add Material in the Actions bar.
A prompt will appear that lets you choose if you want to add a new package and material or if you want to use one of your package templates.
Selecting Add new package and material to shipment on the prompt allows you to search for your hazardous material by either UNID, Proper Shipping Name, or Part Number. To select which of these you would like to search by, click on the drop-down menu under Search Type. Then enter the appropriate UNID, Proper Shipping Name, or Part Number under Search Text. Then click on Search.
After clicking on Search, options will appear for your specific hazardous material based on your search criteria. Anything in blue is selectable, but if it is in black then it is not allowed to be shipped and cannot be selected. Click on either the UNID or Proper Shipping Name of the applicable option to start building your package with that material.
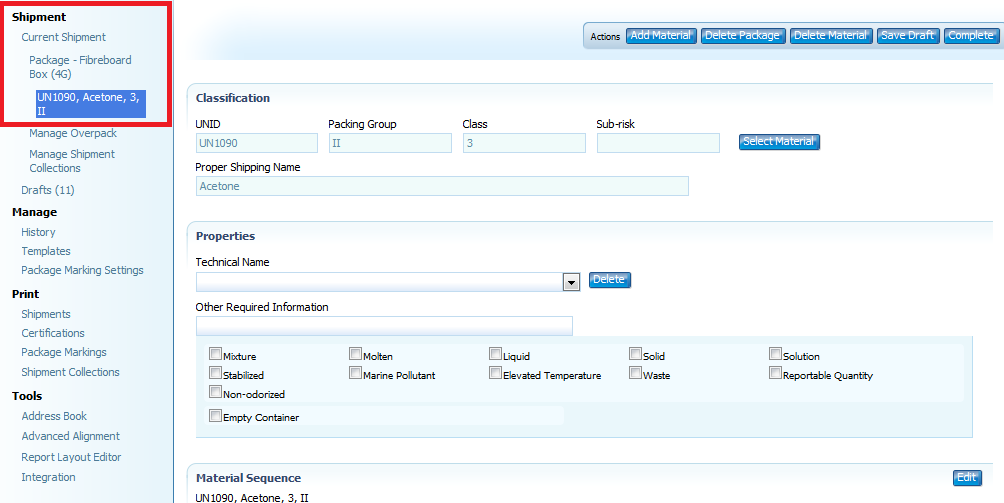
Selecting the hazardous material will bring you to the material screen. This is where you will enter information about the material and the packaging.
The fields under Classification are pre-populated based on your hazardous material selection. If you need to change the material, click on Select Material.
Under Properties you can enter any additional required information such as a Technical Name, Minimum Flashpoint, or Other Required Information.
The Material sequence is also pre-populated; however, it can be edited to some extent by clicking on Edit.
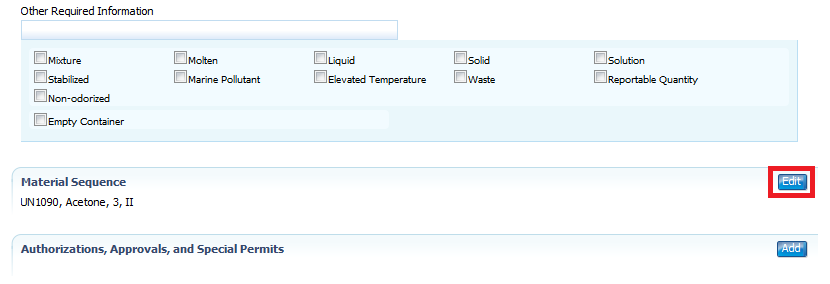
Under Authorizations, Approvals and Special Permits, you can add any special permits that may apply. To do this, click on Add.
Under packing instructions you will find links for the packing instructions and listed maximums. Clicking on the packing instruction links brings you to the Dangerous Goods Advisor (DGA). The DGA contains information for that hazardous material such as packing information, the Emergency Response Guide, and information on limited quantities. Also under packing instructions is a diagram that is a reference for what labels are needed and how they can be put on the package. Please click on the image to see a full picture diagram of the labels.(Note: There is a disclosure on the enlarged picture diagram that explains using the image as an example only. Shippers are fully responsible for correctly placing their labels.)
Under packaging is where you will input information on how much material you have and how it is packed. Read the fields of information in the Packaging section from left to right: first you enter the count for the inner packaging, then the type of inner packaging, then the quantity of the hazardous material in each inner package, then the unit of measure for that quantity. Below that, you will enter the count for the outer packaging and then the type of outer packaging (Please reference the Overpack guide for adding an overpack or pallet to your shipment). There are also fields for additional information like the Package Reference and the Package Weight. These options will change depending on which form type you are using. Both the inner and outer packaging selections can be written in by simply clicking inside the fields and manually editing the text (This applies only to certain forms and when the user option for package validation is turned off).
If you are shipping a package with no inner packaging, you can select Use Single Packaging. This changes the packaging section to only include an outer packaging selection.
There are three levels to your shipment. The material screen with the material and packaging information, the package screen with package information, and the shipment screen with the shipment information. You can select all of these screens from the options on the left-hand side under Shipment. If you need to edit or change anything, this is where you will click to navigate to the appropriate screen. Whichever option is highlighted is the screen that you are currently on.
At any point in creating your shipment you may save a template. You can save a shipment template, which will save any shipment and packaging information you have input so far. This template can then be accessed for future use on the current shipment screen where you select your form type. You create one by selecting Save Template in the action bar on the shipment screen.
You can also create a package template. This will save all of the material and package information (but not the shipment information). This template can be accessed for future use by clicking on the drop down menu under Select a Package Template after clicking on Add Material. You create one by selecting Save Package Template in the action bar on the package screen.
Validating and Printing Your Shipment
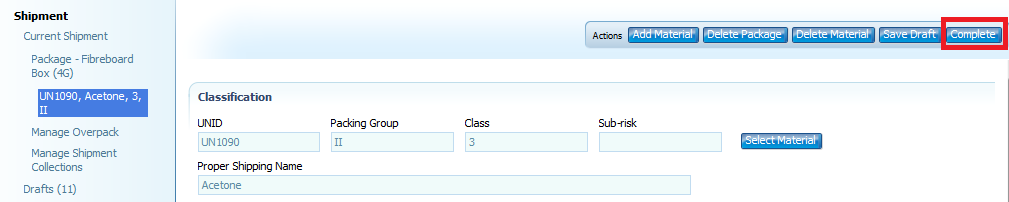
Once you have input all of the shipment information, you need to validate the shipment before you can move on to printing. This is where the program checks your shipment against regulations. Clicking Complete (in the actions bar) on the material screen tells the program to validate your package.
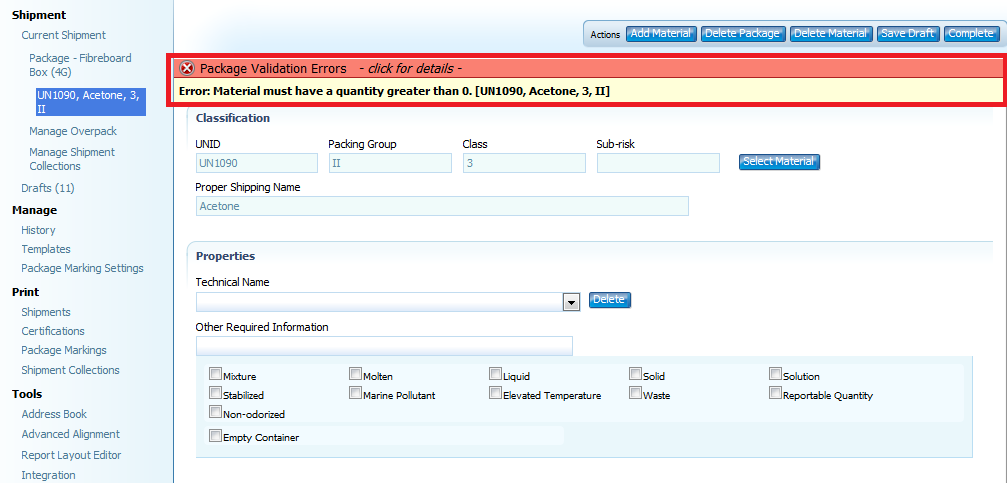
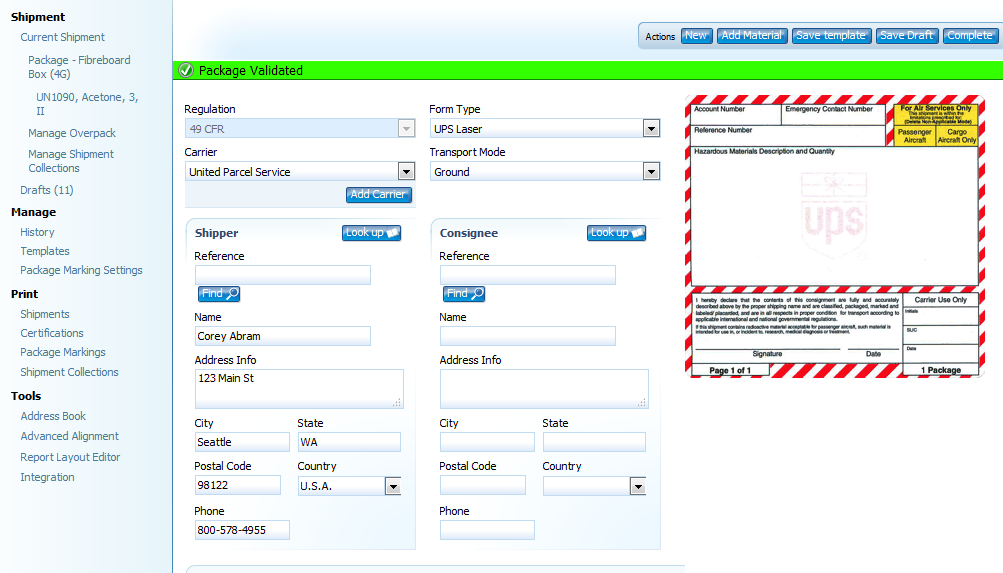
A message will pop up on the top of the screen. It will be either a green, yellow, or red bar. If it is green and says that your package has been validated then your package is acceptable. If it is yellow, it is a warning message. These warnings are messages you need to read and consider but they will not stop you from printing the shipment. If it is red, it is an error message and it needs to be fixed before you will be able to print the shipment. Click on the yellow or red bar to get more details about what might be wrong with your shipment. An example of an error message is shown below.
Once the package gets the green package validated message after clicking on complete, you will automatically be brought to the shipment screen.
To continue your shipment, see: Finishing Your Shipment
0 Comments